Water Heater Installation – Why You Shouldn’t Do it Yourself
Water Heater Installation involves connecting the water heater to the plumbing and gas lines, following local codes. Water heaters also require a temperature and pressure relief valve.
Work on an insulated surface and use a voltmeter to check for voltage when working on electric water heaters. Work safely by using an appliance dolly and a partner to move the new heater. For more information, Click Here to proceed.
If you want to avoid plumbing problems in the future, hire a licensed plumber to do the work. The manufacturer won’t honor its warranty on a DIY installation that isn’t done to state and local building codes. Local codes require permits, inspections and compliance with electrical, heating and ventilation standards. If you do it yourself, be prepared for a challenging project that requires plumbing, electrical and carpentry skills.
Before you start, turn off the water supply at the main shutoff valve or the isolation valve on the cold water line leading to the heater. Also, shut off the gas supply at the valve on the incoming gas line, if applicable.
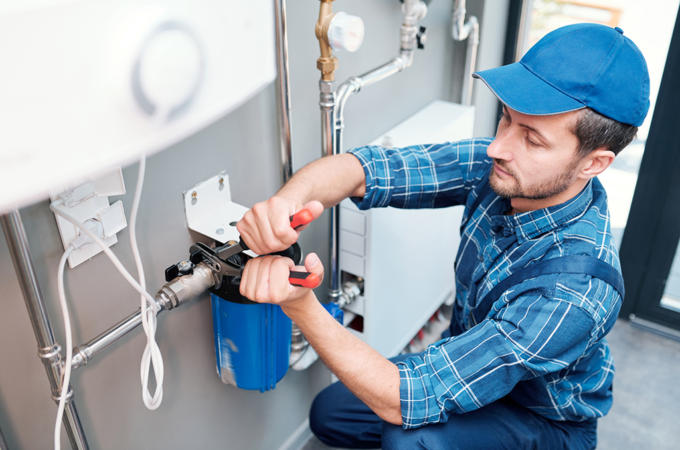
Unscrew the old water heater and disconnect all its piping. Place the new water heater on blocks to elevate it off the floor, if necessary. Make sure the blocks are the same size and placed directly next to each other, so the heater doesn’t fall over.
If the water heater is electric, connect the required 240-volt electrical circuit using threaded connectors compatible with your home’s pipes (typically copper or PEX). Obtain a GFCI or circuit breaker that is rated for the maximum wattage of the appliance. Follow the instructions on the printed installation diagram and the appliance’s product literature to ensure that breaker and wire are sized correctly.
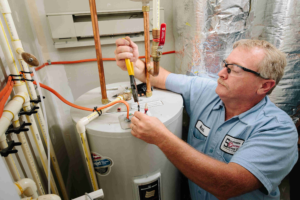
The next step is to install the temperature and pressure relief valve (T&P valve). Use plumber’s tape on the threads of the valve port and screw in a valve with a rated discharge capacity that is greater than the water heater’s BTU-input rating. Route the discharge pipe to a safe location, such as a floor drain or outside.
When the T&P valve is installed and the heater filled with water, open a hot water faucet to let out trapped air. Close the faucet after a few minutes and then check for leaks. If you don’t have a drain valve, install one before moving on. Lastly, clean up and dispose of the old water heater. You may need to get a permit from your municipality to do so, but it’s worth the peace of mind.
Electrical
If your water heater isn’t working correctly, it can have a major impact on your daily life. From hot showers to washing clothes and dishes, hot water is critical to our well-being. If you are in need of a new water heater, installation should be done by a licensed plumber to avoid safety, financial, and legal issues down the road.
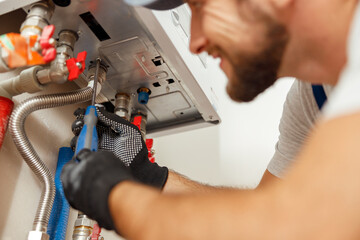
Before beginning any work, shut off the power to the heater at the circuit breaker and use a non-contact voltage tester or inexpensive multi-meter to confirm that the wiring is not energized. Drain the existing heater and disconnect all plumbing and electrical connections to prepare to remove it. It is a good idea to lift the new water heater on cinder blocks or a lifting trolley, rather than directly on the floor, so it doesn’t become damaged, or alter the integrity of the flooring.
Local codes may require a temperature and pressure relief valve (T&P) to be installed on the hot water side of the heater. It is also common for codes to require a sediment trap to prevent sediment and natural gasses from entering the water heater.
When it comes to electric water heater installation, it’s important that the circuit wires are sized properly and correctly connected to the heater. This can be accomplished by following the heater’s printed installation instructions and referring to the manufacturer’s wiring diagram for guidance. Most electric water heaters require a 240-volt circuit, with two 10-gauge wires and a bare copper ground wire.
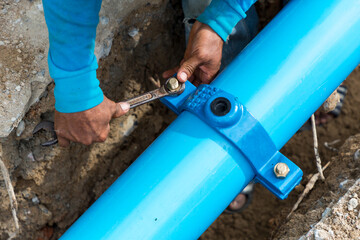
Lastly, when connecting the new pipes to the heater, it is important that you use metal-to-metal pipe fittings and solder them properly. This will prevent rusting and corrosion in the future. If your home uses plastic pipe, such as CPVC or PEX, review the manufacturer’s literature on working with these materials before proceeding.
Once the new water heater is in place, turn on a cold faucet and make sure there are no leaks around the pipe connections. After that, open the hot water faucets and flush out the system by running water through them for several minutes. After the system is completely flushed, it is time to refill and re-energize the heater.
Venting
A water heater needs a venting system to carry combustion air away from the appliance and exhaust gasses. The vent pipe must be sized and routed correctly to prevent carbon monoxide poisoning and to protect the water heater from damage by the hot gases it emits. It must also meet local requirements for distance from windows and other places where venting could draw scalding gases into living areas.
When you install a new gas-powered or direct vent water heater, it’s best to call in a professional. This is a complex job that requires plumbing, heating, ventilation and carpentry skills to handle gas lines and install a new vent pipe in your home. A qualified installer will follow state and local code and obtain a permit for the work and arrange to have it inspected before you can use the water heater.
If you’re switching from an electric tank to a gas-powered model, you’ll need to change the venting system to one that can handle the higher heat output of the new water heater. The new vent pipe must be sized to bring combustion air in from outside and exhaust gasses out, and the venting system must be installed in accordance with the manufacturer’s instructions and local codes.
You’ll need to drain and disconnect the old water heater before you can begin installing the new one. Once the tank is empty, shut off the gas supply and drain the water line, then remove it from the house and dispose of it at a scrapyard or recycling center.
The new water heater will have a pressure and temperature relief valve (in plumbers’ shorthand, T&P valve). It’s important to install and connect this valve correctly, because it protects the water heater by discharging excess pressure from the tank. The code for connecting this valve varies, but most include rules for where the discharge tube can be routed to reduce the risk of flooding or scalding. This pipe must drain to a safe place outside the home or to an indoor catch pan or floor drain, so that it doesn’t build up and cause problems.
Permits
If you are a homeowner and need to replace your water heater, it is important that you understand the regulations in your area regarding permits. Many people are under the impression that a permit is only needed for construction projects or major remodeling work but, in reality, a permit is also required when installing certain electric and gas appliances, such as a new water heater.
Water heaters are complex pieces of machinery that must be properly installed and inspected to ensure safety and compliance with building codes. Without a permit, there are a number of potential issues that could arise, including scalding, legionella bacteria growth, fire, explosions, carbon monoxide asphyxiation and other dangerous conditions.
Thankfully, most jurisdictions have regulations in place to ensure that water heaters are installed correctly, and a permit is a key component of this process. While some homeowners may attempt to install their own water heater, it is recommended that you hire a professional plumber for this project as they can help to ensure the job is done correctly and in accordance with all local codes.
Permits are typically obtained through a simple application process and require information such as the location of the water heater, the type of water heater being installed or replaced, and often include fees for processing the request. These fees are intended to cover administrative costs for evaluating and reviewing applications and conducting inspections.
After a permit has been approved, an inspector will visit the property to inspect the completed installation. During this inspection, the inspector will verify that the water heater has been placed in an appropriate location, that there are adequate clearances to combustible materials and that gas line connections have been made according to code. The inspector will also verify that the temperature and pressure relief valve has been properly installed and is sized appropriately for the water heater.
While some may argue that obtaining a permit isn’t necessary for water heater installations, it is a vital step to take to ensure that the installation meets all local codes and minimizes the risk of hazards and accidents. Moreover, failing to obtain a permit can result in fines and other legal repercussions.